Transfer programs and files to new computer
Transfer files from one computer to another
Transfer Microsoft Office to new computer
Restore programs and files from a broken or dead computer
Transfer directly from an old hard drive
Transfer to new computer using a USB hard drive
Corporate Windows 11 migration
User Profile Migration to new PC / new domain
How To Migrate Local Profiles to Azure AD
Migration to Server 2019 / 2016
Transfer programs and files to new computer
Transfer files from one computer to another
Transfer Microsoft Office to new computer
Restore programs and files from a broken or dead computer
Transfer directly from an old hard drive
Transfer to new computer using a USB hard drive
Move To New PC - Compare Options
Migration Kit Pro - Advanced Transfer
Transfer programs and files to new computer
Transfer files from one computer to another
Transfer Microsoft Office to new computer
Restore programs and files from a broken or dead computer
Transfer directly from an old hard drive
Transfer to new computer using a USB hard drive

Windows 10 is officially released on July 29th, 2015. In this article, we’ll learn how to upgrade to the new Windows 10 from XP, Vista, Windows 7 and Windows 8/8.1, while making sure no programs or files are lost in the process.
NOTE on preserving your programs and files:
If you are currently using Windows XP, Windows Vista, Windows 7 SP0 or Windows 8 (not 8.1), then Windows 10 upgrade will erase all your program and files (see Microsoft Windows 10 Specifications). This can be prevented using Windows 10 Upgrade Companion – a special tool that preserves your programs, settings and files through the upgrade.
In addition, if you are upgrading from a 32bit Windows to a 64bit Windows 10, or upgrading to a different edition (i.e. current Windows is Home, upgrading to Windows 10 Pro), your programs and files will also be removed. Again, this can be prevented using Windows 10 Upgrade Companion, as you can see in the tutorial below. Or, if you are transferring from an old computer to a new computer with Windows 10, check out the Windows Easy Transfer tutorial.
Windows 10 Upgrade Companion is now available! It ensures a smooth upgrade to Windows 10, keeping all your programs, settings and files intact and functional.
You can now have an expert do the whole upgrade for you remotely.
See here for more information.
(it even covers the actual Windows 10 installation)
To navigate easier, choose your current Windows version below. Don’t know which version you are running? Check here to find out.
Upgrade from Windows XP / Windows Vista – to Windows 10
Upgrade from Windows 7 SP1 or Windows 8.1 to Windows 10

Windows 10 is a free upgrade only for Windows 7 SP1 and Windows 8.1.
XP and Vista users have to acquire Windows 10 through retail channels, such as Microsoft.com or any other retailer.
For XP and Vista users, no programs or files will remain available after the upgrade. See note above on how to preserve them.
Any major upgrade may go wrong, and without a backup, you risk losing everything you’ve had on the machine. Therefore, the most important step before upgrading is to back up your computer. If you are using Windows 10 Upgrade Companion, you can simply use its backup function – just run it and follow the instructions. Or, you can also use any 3rd party backup product that can perform a full system image backup.
Once you have your computer safely backed up, you can proceed to installing Windows 10. You can acquire a copy from Microsoft or any authorized reseller. Run it on your computer, and follow the instructions to complete Windows 10 installation.
Once Windows 10 is installed, you need to restore your programs, settings and files. The easiest way to do it is by using Zinstall to restore everything automatically from your backup. Or, you can manually copy files from your backup to the new Windows 10, and install the programs you need.

Good news! Windows 7 and Windows 8 users get Windows 10 for free, courtesy of Microsoft.
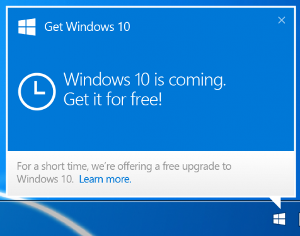
If you are running Windows 7 Service Pack 1, or Windows 8.1 (not 8), you will actually have “Upgrade to Windows 10” available automatically through Windows updates.
If you are running the original version of Windows 7, without the service pack upgrade, you will need to install Windows 7 Service Pack 1 first. Here is Microsoft’s official guide on how to do it.

If you are running the original version of Windows 8, without the 8.1 upgrade, you will need to install Windows 8.1 first. Here is Microsoft’s official guide on how to do it.
As long as you are running Windows 7 Service Pack 1 or Windows 8.1, you get Windows 10 via Windows Updates. You don’t have to do anything special to get it – it will simply appear there and offer to perform the upgrade.
Make sure you have enough free space: You must have at least half of your hard drive free in order to upgrade without losing your programs and files. At the bare minimum, you need 20GB of free space available.
Some settings will be lost: As reports from upgrades are coming in, it turns out that upgrading to Windows 10 does not preserve accounts, login information, passwords and similar settings. If these are important to you, make sure to use Windows 10 Upgrade Companion.
Drivers compatibility: Windows 10 includes drivers that cover most of the hardware components currently on the market. However, for older machines, some drivers may be missing and may require separate installation after the upgrade. Make sure to back up your computer before you start!
Some 3rd party programs may be silently removed: For certain third party applications, the “Get Windows 10” app will scan for application compatibility. If there is a known issue that will prevent the upgrade, you will be notified of the list of applications with known issues. You can choose to accept and the applications will be removed from the system prior to upgrade. Please be sure to copy the list before you accept the removal of the application.
Standard Microsoft applications and common software suites will be preserved. However, less common applications, such as older versions of Office, some accounting and tax software, games, custom applications and other 3rd party applications, may develop issues after the upgrade to Windows 10, or stop working altogether.
To ensure you do not lose anything, remember to do a complete backup of your system before the installation, and restore your programs and files on Windows 10, after the upgrade is done.
Any major upgrade may go wrong, and without a backup, you risk losing everything you’ve had on the machine. Therefore, the most important step before upgrading is to back up your computer. If you are using Windows 10 Upgrade Companion, you can simply use its backup function – just run it and follow the instructions. Or, you can also use any 3rd party backup product that can perform a full system image backup.
Once you have your computer safely backed up, you can proceed to installing Windows 10, by running the upgrade from your Windows updates.
Once Windows 10 is installed, you need to make sure that all of your programs, settings and files are there. The easiest way to do it is by using Zinstall to restore everything automatically from your backup. Or, you can manually copy files from your backup to the new Windows 10, and install any programs that are missing.
